Pages

Tuesday, June 30, 2015

Thank You So Much


Donna K here with you today sharing my last project as
a Design Team Member for Sweet Stamps.
It has a been a fun journey since starting this team back in October of 2013.
I'm very grateful for the opportunity to work with such talented ladies
and to have been able to use the amazing products that Sweet Stamps has to offer.
Thank you to Stacey, Sandy and to Kendra for your guidance and generosity over the past months.
Now...on to my card.
I thought a Thank You card was appropriate for this occasion.


And it goes along with our challenge this week

Brights!

Scroll down to yesterday's post for the link up and DT inspiration. 
Be sure to check out all of the  Sweet Stamps /Globecraft & Piccolo  links listed below:


Monday, June 29, 2015

Challenge 228 - Bright Colors

Hello Sweet Stamp Friends!
Happy Monday!!

Time for another weekly challenge!

Our theme is....
Bright Colors
Let's see some bright colored creations!!


DT Sweeties projects...


We'd love to see your beautiful creations, so come play along! {Cards, ATCs, scrapbook pages, mixed media, altered art, etc.} You could win a $10 shopping spree for goodies at SweetStamps.com's online store by playing along in our challenge! 

Click here for our complete Challenge Rules.

 * * * * * * * * * * * * * * * * * *

***Check back throughout the week for more inspiration from our DT Sweeties!!***

Happy Stamping! 
Have a super sweet week!


Sunday, June 28, 2015

For the Bride


This one basically made itself. It was that simple.
 
 
Layer textured papers with lace medallions.
 
Add your cameo.
 
Simply beautiful.
 
Have a great week.


Friday, June 26, 2015

Baby You're a Firework...

Oh come on you know you are singing the song now, hehehe!  Hello!  Happy Happy Friday!!!  Lisa here with you and I'm so happy to share a card that was created more or less by accident! When I first started working on this card I was simply playing around to see how it would turn out stamping and embossing the fireworks in various embossing and enamel powders... then when it was done I loved it so much I had to use it... but where to put a sentiment?  Then vellum came to the rescue!  With a little embossing and some stickers... ta da!


See the pretty sparkles?!  I just love the SweetStamps.com embossing powders, there are so many fun choices and the colors/shine are amazing in person!

I hope you'll get a chance to join us in our challenge this week too!  The theme for this challenge is Anything but a Card... all products are welcome, and those using SweetStamps.com products get an extra entry!

Good luck and Happy Crafting!!!
Lisa

Supplies Used:


Thursday, June 25, 2015

Color Bursting Tag

For the Sweet Stamps "Anything but a card" challenge, I decided to make a tag ..... The challenge link is HERE


I got out a new (to me) crafting medium- Color Bursts from Ken Oliver Crafts available at Sweetstamps. Color Bursts are pigments that are very fine and come in a 8g bottle. You lightly squeeze the bottle they are in, and mix  the powdered pigment with liquid and the colors come alive. They are transparent and are NOT water resistant. (Eg, Think of what happens when you flick water droplets on Distress Inks- Color Bursts will react the same way). Have paper towels available to blot color if it is too wet and to avoid getting your colors muddied.... You will see that the colors do mix with one another where they overlap. (So, dry between colors if you do not want that look). If using just one of the colors, as the pigment spreads out on the cardstock, you may see other colors 'come out'. If you do not like colorful hands, consider wearing gloves, although the color does come off with a little work : )

  I went to You Tube and found a number of ways to create with the pigments:

  1) Place in a container and spritz some water in and use as a watercolor. A little goes a long way, so be conservative when you make up your first couple of batches. See the Julie Fei-Fan Balzar link for visuals on this method.
  2) Use them as a wash- Sprinkle them on a watered surface and let them spread.
  3) Spritz more water on #2 and let them run
  4)Add to clear Gel Medium- this will make the color permanent (they remain translucent if you mix them with a translucent medium). (Julie Balthazar)
  5)Place some Color Burst in a mister and add water- makes a spray.
  6)Emboss your image for an emboss resist. You can apply Color Burst to cardstock first, then emboss as well for a colorful resist. (there will be color under the embossing, then add color on top of it).
  7)Apply over a stencil and spritz with water. Use the top side on another sheet of cardstock. Or, flip the wet stencil over onto another piece of cardstock and start spritzing on the color.  (Lindsay the Frugal Crafter). I tried this using a SweetCuts die using white glossy cardstock.
  8)Apply to your craft mat, spritz and blot your paper in the wet pigment.
  9)When good and wet, use your heat tool to 'blow' or move the color around.
  10)Add flecks or droplets of color using a paintbrush/toothbrush.
  11)Use baby wipe- apply color directly to it and use as a stamp pad, or use to swipe color directly to cardstock. For more faded colors, spritz the baby wipe with water first- it dilutes the color.
  12)Use Color Burst on cardstock.  Place color side against a stencil, spritz H2O on the back side and let dry.  You will have ghosting on the color side of the cardstock once it dries. Do not set it on anything when drying that will affect the ghosting process.  (Sparkle n Sprinkle).
  13)Spray 5-6 spritz of Color Burst in a container of H2O, and place sheets of watercolor paper into it- ~ 1 hour- the color will 'wick' up onto the cardstock. You can turn over and do the other side s well (Sparkle and Sprinkle).
  14)You can dye your Seam Binding/ribbon/lace with it.
  15)Color your modeling paste.  How dark/bright/colorful it is will depend on how much you use in proportion when mixing them.  Use it anyway you would use modeling paste- my first thought is a stencil. If you add color with Color Burst over the colored modeling paste, the color you are painting with will wick into the modeling paste
  16) Cut out a die using a piece of plain paper, place over the Color Burst cardstock and you will have a colorful opening where you cut out the die.  OR, reverse that and cut the die out of the Color Burst cardstock and have the plain cardstock showing thru- the examples were white and black, any color would work.
  17) Use Masking fluid on the cardstock- let dry, then apply the Color Burst ( eg a written word like LOVE). When you peel off the masking fluid ..... it will show off the resist area in the color of the base cardstock.

My first step with a new medium is to make color swatches
The top row is manilla folder cardstock, the middle row Georgia Pacific and the bottom row is Watercolor paper.  The water sat on top of the manilla folders and did not dry as fast as the other two.  I also made dyed ribbon for each color as well- placing the seam binding in a baggie, spritzing with
water then adding the color burst and mixed it all up from the outside- no getting dye all over my fingers : )

Here is a peak at #7 in my list- I used a Swetcute die cut from glossy cardstock instead of a stencil- I will be able to use the colored die cut in the future too : )
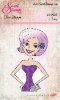
My tag was made using the 2nd tag one from the Lt........  I got some of the Color Burst on the mat, so I misted it and picked up the color off of the mat- #8 on the list above. The ribbon on my tag is from the Orange Color Burst.

Here are the products I used for my tag:


 I would love to hear any additional ways you can think of to use Color Burst- looks like I am going to be having a blast experimenting!

Here are a few of the links I watched:
Julie Fei-Fan Balzar: https://www.youtube.com/watch?v=PEWvH-jej00
Catherine Pooler; https://www.youtube.com/watch?v=GmgCleEXGmE
Sparkle N Sprinkle Demo Donna : https://www.youtube.com/watch?v=OAaPyVbyMhQ
Lindsay the Frugal Crafter: https://www.youtube.com/watch?v=DCIhTedWBK0

Thanks for stopping by!
 Shelly

Wednesday, June 24, 2015

Flowers and Bees

The image and die cuts were colored with Copic markers.

The background was created with one of the new SweetStamps stencils named Roof Tiles and Ranger Distress Ink.  No masking but I was extra careful to avoid the image using a makeup wedge as a sponge.

Images: SweetStamps -Autumn Blooms
Paper: Bazzill - orange, Beckett Expressions - image panel and bees, Recollections - cream, unknown burgundy
Ink: Memento - Tuxedo Black, Ranger Distress Ink - Antique Linen
Tools: Spellbinder frame die, Memory Box bee die, Scor-Pal - line embossing, SweetStamps stencil -  Roof Tiles
Accessories: Eyelet Outlet - pearls, Paper Glaze to attach pearls, Aleene's tacky glue to attach bees, foam tape


Tuesday, June 23, 2015

Not a Card

Donna K with you today sharing a few projects for the
latest challenge.

The theme is Anything but a Card and you have all week to play along. 
Here are a few of my favorite projects that fall into this category.

Have a beautiful day gift tag.


and a darling little just because pillow box.

Thanks for stopping by today!

Be sure to check out all of the  Sweet Stamps /Globecraft & Piccolo  links listed below:

Monday, June 22, 2015

Challenge #227 Anything But a Card

Hello Sweet Stamp Friends!
Happy Monday!!

Time for another weekly challenge!

Our theme is....
Anything But a Card


DT Sweeties projects...


We'd love to see your beautiful creations, so come play along! {Cards, ATCs, scrapbook pages, mixed media, altered art, etc.} You could win a $10 shopping spree for goodies at SweetStamps.com's online store by playing along in our challenge! 

Click here for our complete Challenge Rules.

 * * * * * * * * * * * * * * * * * *

***Check back throughout the week for more inspiration from our DT Sweeties!!***

Happy Stamping! 
Have a super sweet week!


Friday, June 19, 2015

Hello Friend and a New to Me Technique

Hello!  It's Lisa here with you all and I'm excited to be here today and to share a new to me technique with all of you!  I am not sure of the technical term for this technique, but I am calling it water stenciling, hehehe! Take a peek below at my card...


To create this look I merely laid down my stencil over watercolor cardstock making sure to use washi tape on all four sides and rolled a little under the cardstock to keep it in place.  I then spritzed my paper with water and dropped the color in by using a waterbrush and peerless strips,  (You can see how it looks in the photo below) letting the water do it's magic.


Next I stamped my girl on separate watercolor cardstock and colored her with the same peerless colors as well as some Distress Markers.  Tip: Make sure you allow for drying time before watercoloring two touching areas in different colors.

To finish the whole project and to follow the sketch I was inspired by I added a die cut tag in vellum, trimmed one corner and embossed my sentiment in white on black paper.  Finally I added three sequins in complimentary colors.

I hope this has given you a new way to use your stencils, and make sure you head over to the shop to see all of the new stencils that were just added on Monday!  I LOVE them!!!!

Happy Crafting!
Lisa

Supplies Used: